Release builds
In a simple issue workflow, a fixer might complete an issue and change its status to Ready for Retest. This would notify the tester that the issue is ready for testing.
However, for most teams, it makes more sense to batch issues together. For instance, a development team might want to push all of their change commits to a staging environment at one time rather than have each individual push changes up on their own accord. This common scenario is just what release builds were made for.
Release builds coordinate a team to retest a batch of issues in a single project all at once—when those issues are ready.
Here's how the workflow goes for a team using release builds.
- Fixers work on issues, then mark the issue as Ready for Next Release when they've completed the issue.
- When the team is ready, a project admin creates a release build.
In a release build...
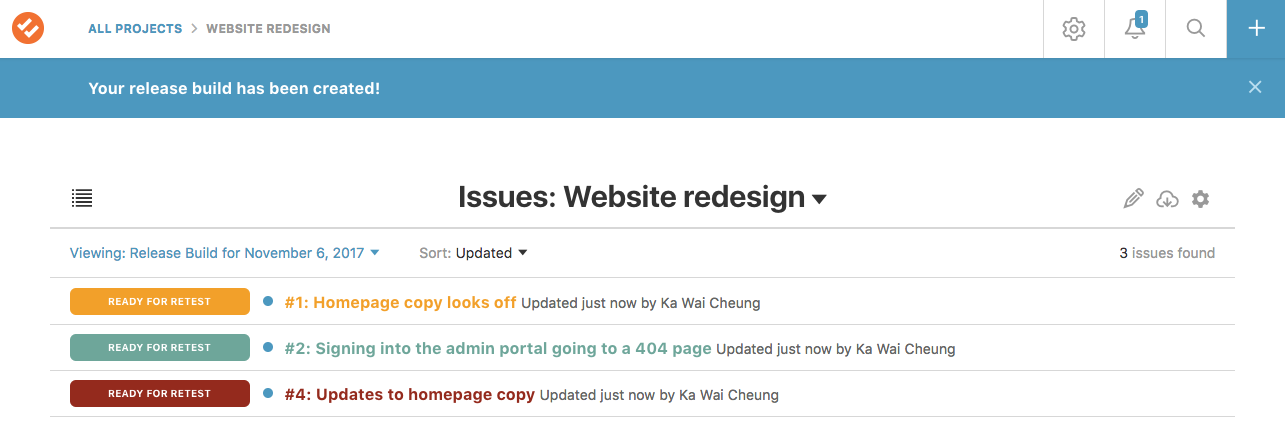
- All issues marked Ready for Next Release automatically are switched to Ready for Retest
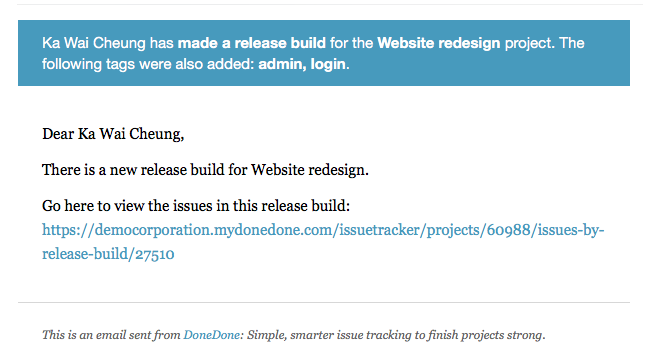
- All testers on the issues are notified of a release via email. The email can also be customized with additional information (e.g. environment, links, and other notes).
- The email also contains a custom link to all issues in the release.
- Should a team want to have multiple releases of the same issues, DoneDone lets you "re-release" a prior release build.
This article will go through:
Creating a release build
To create a release build, you need to have at least one issue marked
Ready for Next Release.
- 1
-
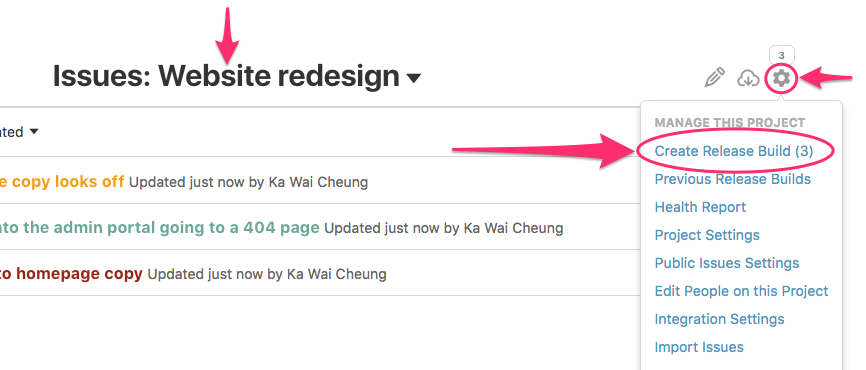
If you're a project or account admin, head to the project's dashboard, then click on the Project Settings icon and choose Create Release Build. Note: The number above the Project Settings icon indicates the number of issues in the project currently marked Ready for Next Release.
- 2
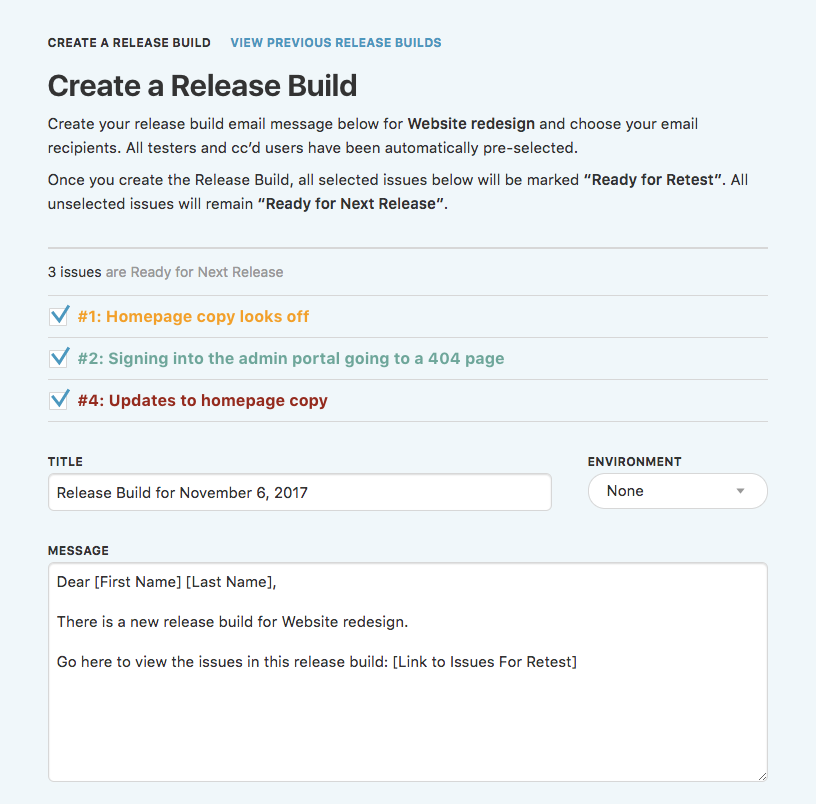
- On the Create Release Build panel, you can select/de-select any issues for the release, include a title and message for the email sent to your team about the release, and optionally choose an environment where the issues are located.
- 3
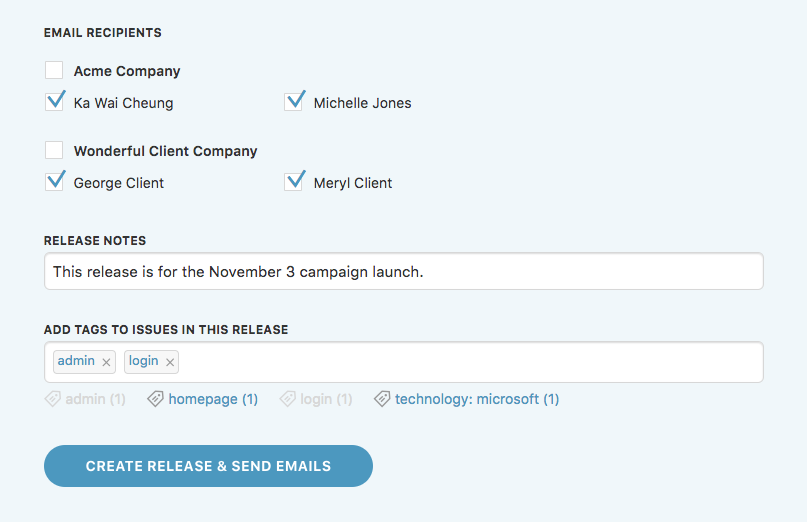
- Next, choose everyone who should be copied on the email. By default, DoneDone pre-selects anyone who is assigned the tester of at least one of the issues marked Ready for Next Release. You can also add a note to the release and include tags on all issues in the release. By the way, this is a great way to organize issues if you have a development environment workflow.
- 4
- Click the Create Release & Send Emails button to complete your release build. Your team can now begin testing the issues in the release build!
Viewing and releasing prior release builds
You can also view and re-release previous release builds.
- 1
-
If you're a
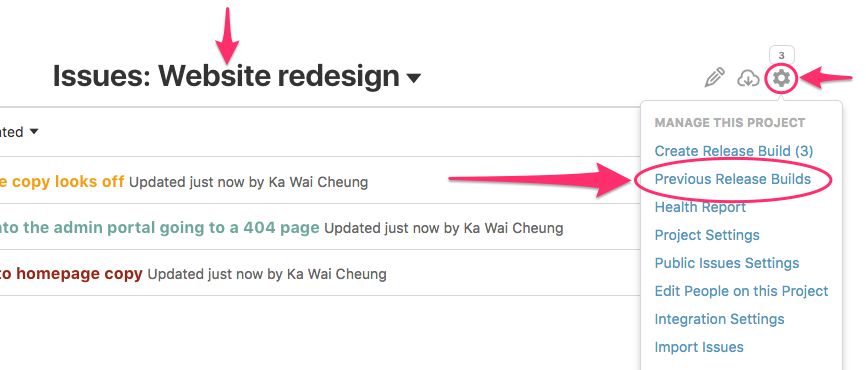
project or account admin, head to the project's dashboard, then click on the Project Settings icon and choose Previous Release Builds.
- 2
- On the Previous Release Builds panel, click the release build to view the issues in a previous release build. Or, click the Rebuild button to initiate another release with the same issues.

- 3
- If you are rebuilding a prior release build, simply follow the steps above to create your rebuild.
Turning off release builds
There may be projects where release builds don't make sense for your team. In that case, you can "turn off" release builds. This means you will no longer see options to create or view release builds and your team will no longer have the Ready for Next Release issue tatus option.
- 1
-
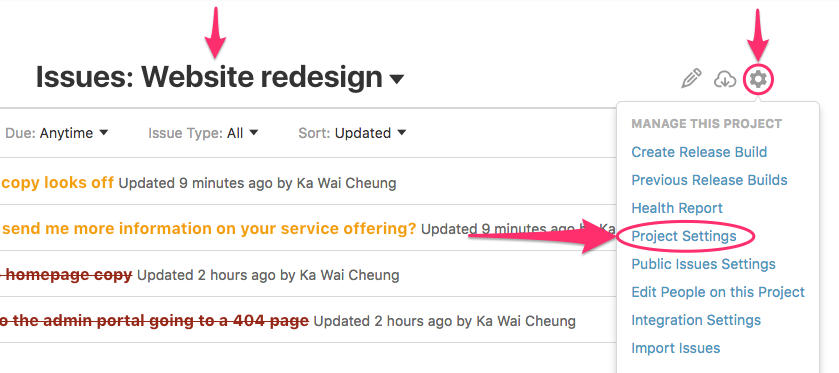
If you're a project or account admin, head to the project's dashboard, then click on the Project Settings icon and choose Project Settings.
- 2
- On the Project Settings panel, scroll to the Release Builds section and click the Disabled radio button. Then, click the Save Changes button at the bottom.

- 3
- Now, you will no longer have the option to create or view release builds.
- 4
- To enable release builds again, head back to the Project Settings panel and click the Enabled button.